Expo In-App Purchase Tutorial
The getting started guide for in-app purchases and subscriptions


Josh Holtz
At RevenueCat, we aim to make it as easy as possible for developers to monetize their apps. One of the ways we do this is by providing easy-to-use native and cross-platform SDKs like React Native. And we’re always looking for ways to improve the developer experience.
Expo is a service that makes it easy to develop, test, and release React Native apps. Expo extracts a lot of the Android- and iOS-native build intricacies so that developers only have to write JavaScript/TypeScript. There are two ways to build an app in Expo: the bare workflow or the managed workflow. The bare workflow gives you more control but requires a more complex technical setup, while the managed workflow handles most of the complexity of building an app for you. Until recently, RevenueCat could not support apps built with the managed workflow.
That changed when Expo added support for in-app payments and permissions in their native app-building pipeline. Now, Expo users can install RevenueCat’s react-native-purchases library and supercharge the Expo managed workflow to include cross-platform in-app purchases and subscriptions via RevenueCat—without having to worry about anything native!
In this post, we’ll talk about how smoothly RevenueCat and Expo work together, as well as walk through how to create a managed workflow with the react-native-purchase library.
Getting started with RevenueCat and Expo
Creating a new managed-workflow React Native app with Expo and RevenueCat is pretty straightforward!
Step 1: Creating projects and installing dependencies
The first step is getting an app started. We’ll need to install the Expo CLI tools, create the app, and install the project dependencies.
The first dependency is expo-dev-client. This is used to get extra debug capabilities and lets us load projects from the Expo CLI into the builds created by Expo’s managed workflow. The second dependency is react-native-purchases. This is RevenueCat’s React Native library. It does not need any special integration with Expo, but it does need to be installed as a dependency.
npm install -g expo-cli
expo init my-app
cd my-app
expo install expo-dev-client
expo install react-native-purchases
Step 2: Configure your RevenueCat products and offerings
After you’ve started the base project, it’s time to configure your app’s products and offerings. If this is your first time setting up RevenueCat (or if you need a quick refresher), check out the Quickstart section of our docs.
Step 3: Integrate react-native-purchases in the app
Now that we’ve created the app and installed react-native-purchases, we can update our code to fetch our RevenueCat offerings.
Here’s a simple (and rough 😅) React Native TypeScript app that does just that.
Note: Make sure to set your Apple and Google RevenueCat API keys with the placeholders if you use this example code.
Step 4: Native app building
This step differs from most other SDK configurations. Usually, at this point, we’d recommend running a development build from the IDE (Xcode or Android Studio) on your machine and testing in-app purchases on a simulator or emulator. This is not the case with Expo. The benefit of Expo’s managed workflow is that we don’t need to worry about the native parts! Instead, we’ll use the command line to start Android and iOS development builds on Expo’s server, wait for them to complete, and then install those apps on our test devices.
We’ll use the eas tool to start these builds. EAS stands for Expo Application Services—the cloud services that Expo hosts for building the native binaries.
Here’s how to run the builds for both Android and iOS:
Android
Run the following command to get the Android development build started on EAS:
eas build --profile development --platform android
Before this command starts the build, you’ll see a few prompts. The first one will be your application ID (the ID that you registered in Google Play and RevenueCat). The second prompt is about the Android Keystore. This is what you use to sign your APK so Google Play knows that all updates are actually made by you. You can either have Expo generate one for you, or you can specify your own.
After that, Expo will start your build, and in a few minutes, your APK will be ready to install. You can either scan a QR code, go to a URL to download the APK, or manually download and send the APK to your Android device.
To see your configured products in your Android app, you’ll need to upload this APK to Google Play. This APK does not need to be released to production—uploading it to an internal track is sufficient. The important thing is that the version number of the APK you are testing is the same as the one you have set up in Google Play.
See our help docs to learn more about sandbox testing for Google Play.
iOS
Run the following command to get the iOS development build started on EAS:
eas build --profile development --platform ios
Just like with the Android build, this command will present you with a few prompts before the build starts. These prompts will ask for the bundle identifier, followed by a few questions that are needed for code signing. The code signing prompts will ask if you have an existing certificate and provisioning profile that you’d like to use for signing. If not, you can enter your Apple ID credentials, and EAS will create a provisioning profile for you, as well as register your devices to the provisioning profile.
Once you’ve entered this information, the build will start. When it’s finished, you’ll receive instructions for installing the build on your device.
Step 5: Native app testing
Now that Expo has built our native apps for us, we can begin testing our React Native app and RevenueCat integration. We’ll do this by running a local development server that our native apps can connect to. That command is:
expo start --dev-client
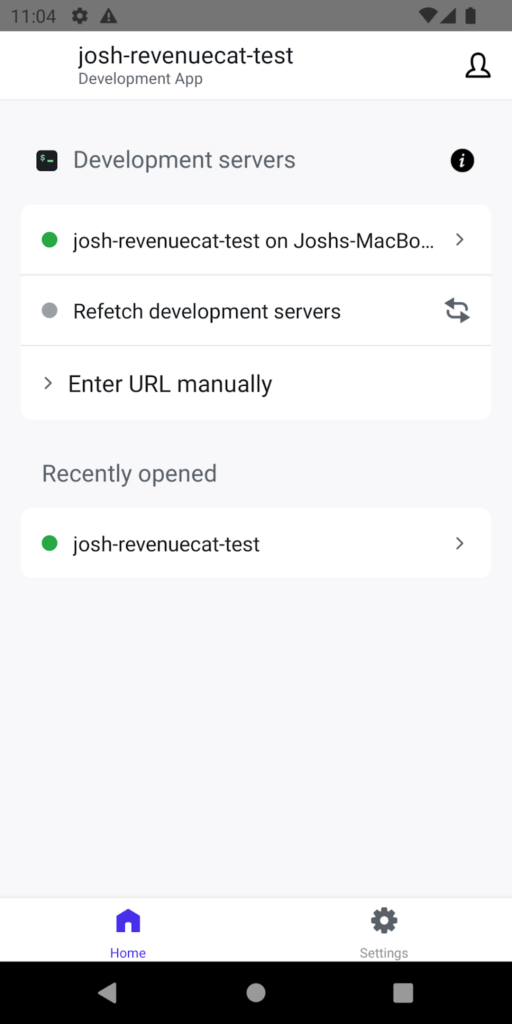
When you open either the Android or iOS app, you’ll be presented with a screen to connect to the local development server. Your phone may find the local development server automatically, but it might not—I had to manually connect to mine by entering the local IP address of my computer.

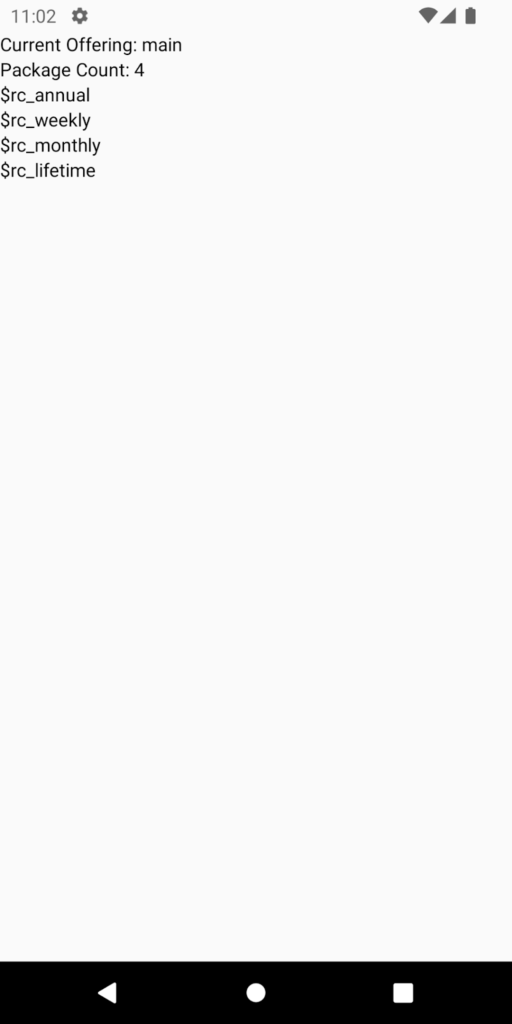
Once you’re connected, it will load your React Native app. And if all goes well, RevenueCat will load your offerings and products!

If something goes wrong, there are some tools that you can use to debug. RevenueCat has debug logs that print to the console. If you are using an iOS device, you can use Console.app on your Mac to view these logs. If you are using an Android device, you can use LogCat (or Android Studio) to view these logs. The logs will show what products can or can’t be loaded, as well as any associated errors.
Now it’s easier than ever to monetize your app. All you have to do is write some React, tell Expo to build your apps, and let RevenueCat do all of the tricky cross-platform in-app purchase logic.
We’re excited to help developers make more money with less work with these new RevenueCat possibilities in Expo! You can create your free RevenueCat account here to get started.
In-App Subscriptions Made Easy
See why thousands of the world's tops apps use RevenueCat to power in-app purchases, analyze subscription data, and grow revenue on iOS, Android, and the web.


